

Introduction
In today’s data-driven world, a basic router can’t keep up with modern demands. Buffering videos, inconsistent speed, and poor control over devices make traditional networks frustrating. That’s where Edge AI and DIY home networking step in.
In this blog series, we’ll build a smart, self-monitoring telecom setup using:
- A Raspberry Pi
- Edge AI tools
- A TP-Link Smart Router
- And simple scripting
This is Part 1: we’ll cover the setup and monitoring layer. No coding experience? No problem.
1. Tools You’ll Need
| Component | Description | Buy Link |
|---|---|---|
| Raspberry Pi 4 (2GB or 4GB) | Small Linux computer | Buy on Amazon |
| microSD Card (32GB) | For OS & logs | Buy on Amazon |
| TP-Link Deco / Archer Router | Smart Router with app | Buy on Amazon |
| Internet Connection | Broadband or Fiber | — |
| Laptop/PC | For SSH & configuration | — |
2.Raspberry Pi Setup
Let’s start with the Pi.
- Flash Raspberry Pi OS Lite
- Download Raspberry Pi Imager
- Select: Raspberry Pi OS Lite (64-bit)
- Flash to microSD using a card reader
- Enable SSH
- After flashing, open the boot partition
- Add a blank file named
ssh(no extension)
- First Boot + Update
Insert SD card, power up, connect to the network.
Login via terminal or SSH:
ssh pi@<raspberry_pi_ip>
Note: #default password: raspberry
Update your Pi:
sudo apt update && sudo apt upgrade -y
3. Installing Pi-hole
Let’s block ads and monitor DNS traffic locally.
Install Pi-hole
curl -sSL https://install.pi-hole.net | bash
Follow the prompts → Choose your network interface → Set a static IP.
Dashboard Setup
Once installed, access:
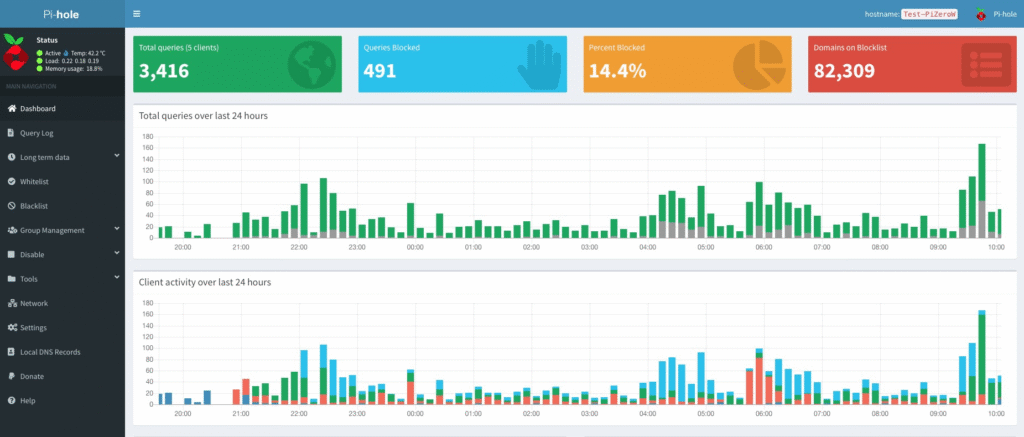
4.Speedtest Integration (Optional but Awesome)
Want to log your internet speed automatically?
Install CLI Tool
sudo apt install speedtest-cli
Add Cronjob for Auto Logging
crontab -e
Paste this at the end:
*/30 * * * * speedtest-cli >> /home/pi/speedlog.txt
Note: This logs speed every 30 minutes. Use it later for AI analysis in Part 3.
✅ Wrap-Up
You’ve now:
- Set up your Raspberry Pi
- Installed Pi-hole to block ads and monitor DNS traffic
- Configured automatic internet speed logging
Up Next in Part 2:
We’ll add Home Assistant, automate bandwidth alerts, and create smart rules for your devices.
🛠️ TechieBano.Com | Smart Gear. Smarter Minds.