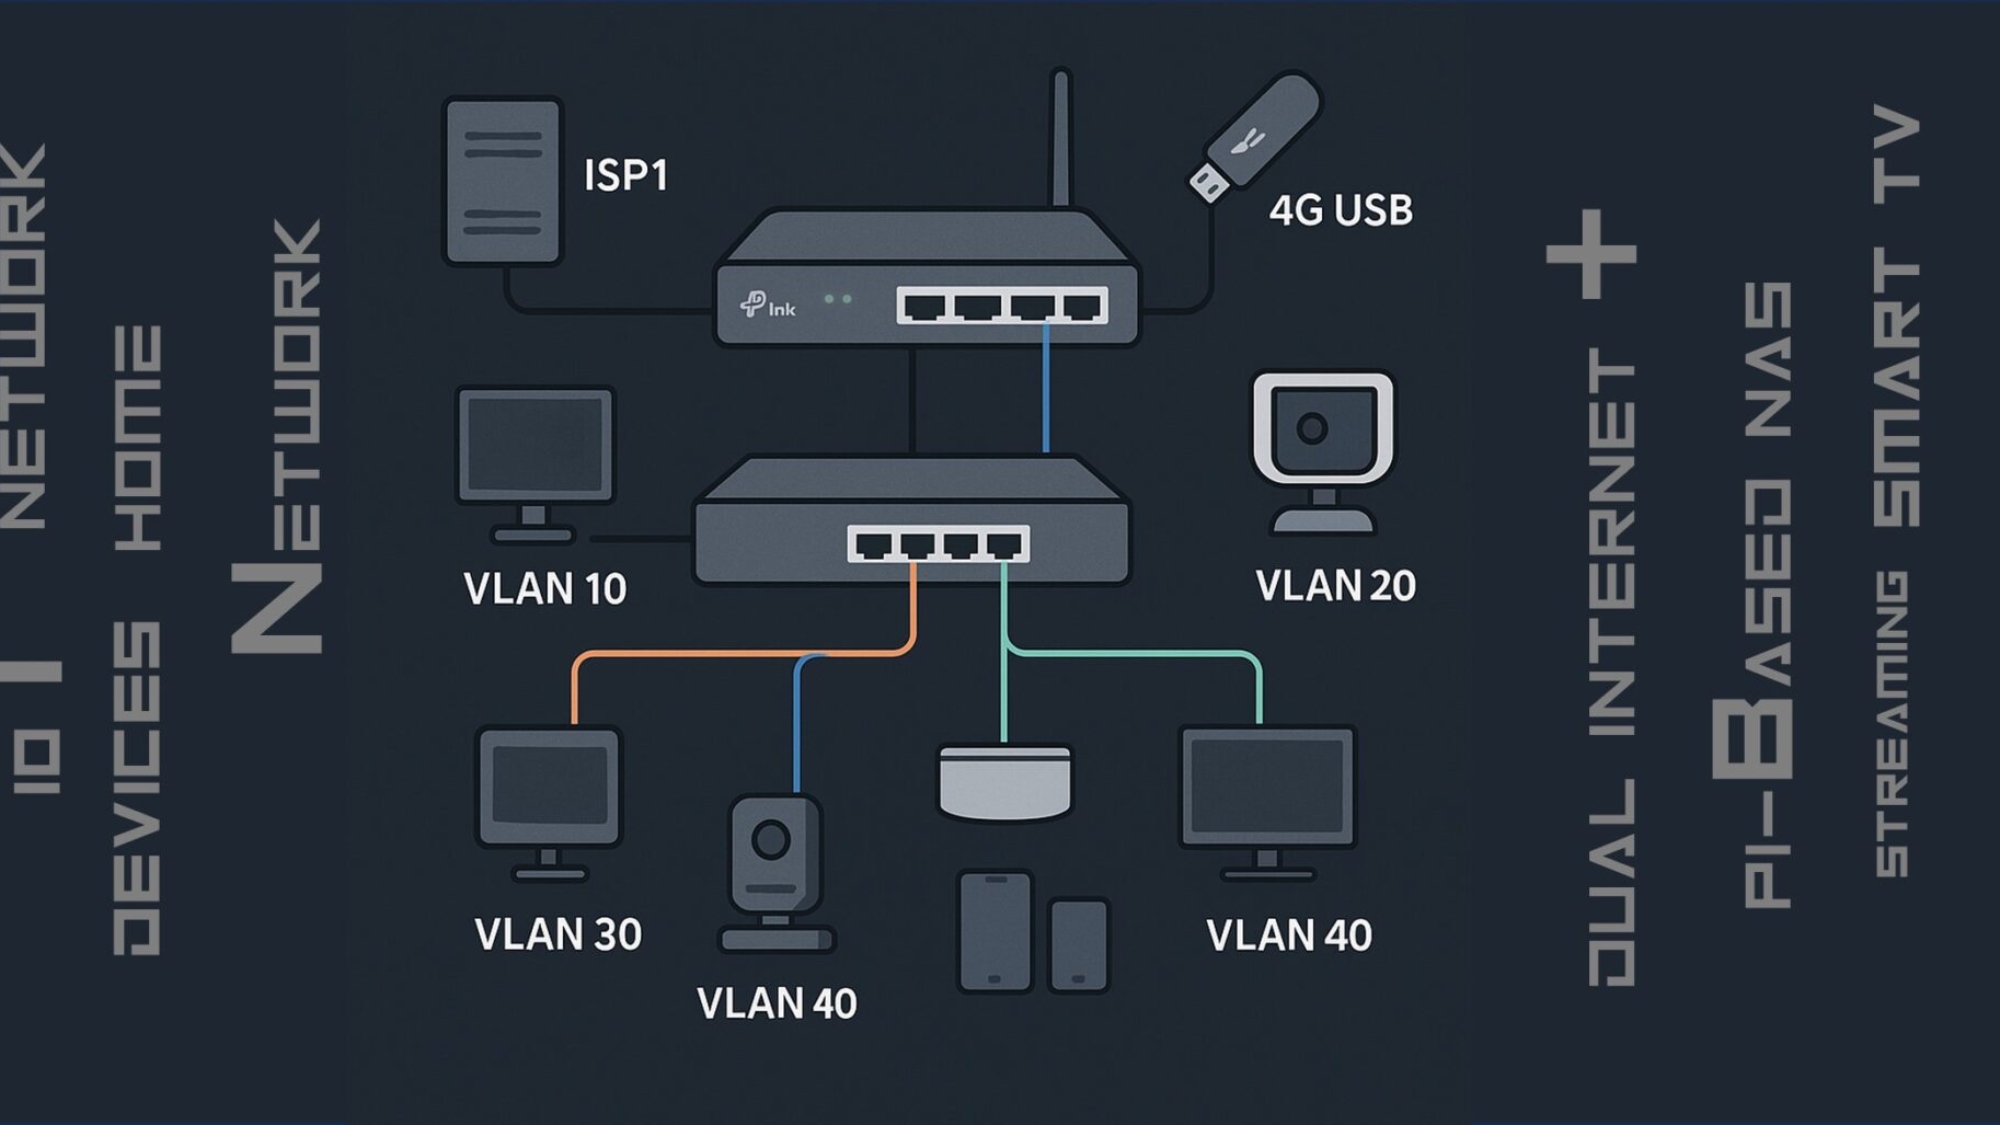
In today’s connected homes, where your Smart TV is streaming, CCTV is recording, IoT devices are chatting, and you’re handling Zoom calls from your Tech PC—all at once—a basic plug-and-play router simply can’t keep up.
This guide helps you build your own professional Dual Internet Home Network with:
- Dual ISP failover,
- Managed VLAN segmentation,
- Mesh Wi-Fi coverage,
- Local NAS storage,
- and Edge automation using Home Assistant.
If you’ve ever asked, “How do I future-proof my smart home network?” — this is your step-by-step telecom-certified answer.
Network Goal
To build a robust, secure, and scalable LAN/WAN network supporting:
- IP CCTV cameras,
- IoT devices,
- Smart entertainment,
- Work-from-home PCs,
- Personal mobile gadgets.
Requirements Checklist
A. Core Network Hardware
| Device | Recommended Model | Role |
|---|---|---|
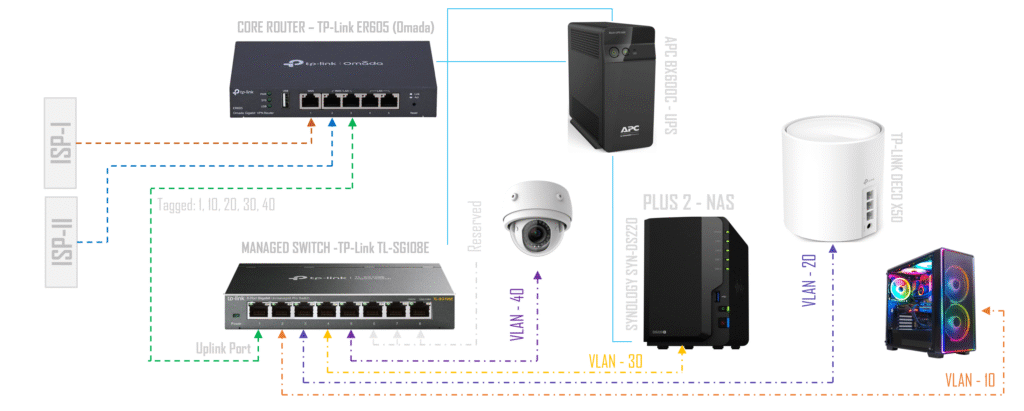
| Router | TP-Link ER605 / Ubiquiti EdgeRouter | Dual WAN gateway & VLAN core |
| Managed Switch | TP-Link TL-SG108E (8-port) | VLAN segmentation & wired traffic control |
| Mesh Wi-Fi / APs | TP-Link Deco X50 (2–3 nodes) | Strong, consistent coverage |
| NAS (Optional) | Synology DS220+ / Raspberry Pi + USB HDD | CCTV backup & file server |
| UPS | APC 600VA | Power backup for router/switch |
| ISPs | Dual ISP Setup (Fiber + 4G) | Redundant internet access |
B. Cabling & Accessories
- CAT6/CAT6A LAN cables (flat type for aesthetics)
- RJ45 keystone wall jacks or patch panels
- Surge-protected power strips
- Velcro ties or trunking for cable management
Logical Network Design – VLAN Segmentation
Segmenting your network with VLANs boosts security, QoS, and isolation. Below is the layout:
| VLAN ID | Device Group | Subnet | Purpose |
|---|---|---|---|
| VLAN 10 | Tech PC, Laptops | 192.168.10.0/24 | High-priority work devices |
| VLAN 20 | IoT + Smart TV | 192.168.20.0/24 | Internet-only, limited access |
| VLAN 30 | NAS | 192.168.30.0/24 | Limited speed & time-based access |
| VLAN 40 | IP Cameras | 192.168.40.0/24 | Isolated CCTV feed to NAS |
| VLAN 50 | Admin/Core | 192.168.50.1/24 | Management-only VLAN |

Fig. Topology for Home Network
DIY Implementation Of Dual Internet Home Network:
Step 1: Router & ISP Setup
- Connect ISP1 to
WANport of ER605 - Connect ISP2 (4G USB Dongle or JioFi tether) to USB port
- Log into router → Configure Failover or Load Balance
- Set initial LAN IP to
192.168.1.1/24for admin setup
Tip: Use Cloudflare (1.1.1.1) or Quad9 (9.9.9.9) for encrypted DNS over HTTPS.
Step 2: Managed Switch & VLAN Configuration
- Connect router LAN to Port 1 of TL-SG108E
- Assign VLANs to switch ports:
| Port | Connected To | VLAN | Tagging |
|---|---|---|---|
| 1 | Router | Trunk | Tagged (All VLANs) |
| 2 | Tech PC | 10 – Access | Untagged |
| 3 | TP-LINK DECO X50 | 30 – Access | Untagged |
| 4 | SYNOLOGY SYN-DS220 PLUS 2 – NAS | 20 – Access | Untagged |
| 5 | IP CCTV | 40 – Access | Untagged |
| 6- 8 | Reserved | – | – |
Step 3: Wi-Fi SSID Structure (Mesh/AP Setup)
If using Deco X50:
- Set to Access Point Mode
- Create separate SSIDs with VLAN tags:
| SSID Name | VLAN | Use Case |
|---|---|---|
| HomeMain | 10 | Tech PC, Phones |
| IoT-Net | 20 | Smart Plugs, TV, IoT |
| CCTV | 40 | Hidden or Admin Only |
| GuestZone | 40 | Time-limited, throttled |
Most Deco models support basic VLAN tagging via Omada Controller.
Step 4: DHCP & Static IP Mapping
| Device | Static IP | VLAN |
|---|---|---|
| Tech PC | 192.168.10.10 | 10 |
| CCTV 1–4 | 192.168.30.101–104 | 40 |
| NAS Server | 192.168.30.200 | 30 |
| TP-LINK DECO | 192.168.20.50 | 20 |
Use static leases via ER605 DHCP binding settings.
Step 5: Network Security & Firewall Rules
Apply inter-VLAN and inbound firewall policies:
- Allow Admin VLAN to access all
- Block IoT ↔ Work VLAN
- Block WAN → CCTV VLAN
- Enable DoH DNS for all outbound requests
Use MAC filtering or 802.1X for further hardening.
Don’t treat your home like a café Wi-Fi zone. With just a little planning, you can achieve enterprise-grade control, minimize risks, and guarantee performance — even during peak hours or ISP outages.
Your network is the digital nervous system of your smart home. Whether you’re streaming, working, or securing your home with IP cameras — don’t leave it to luck.
This DIY setup gives you:
- Peace of mind,
- Redundancy with Dual ISPs,
- Bandwidth prioritization,
👉 Next in the Series: we will see how to setup Home Network with Edge AI

